Adobe Portfolio - Managing and Adding Content

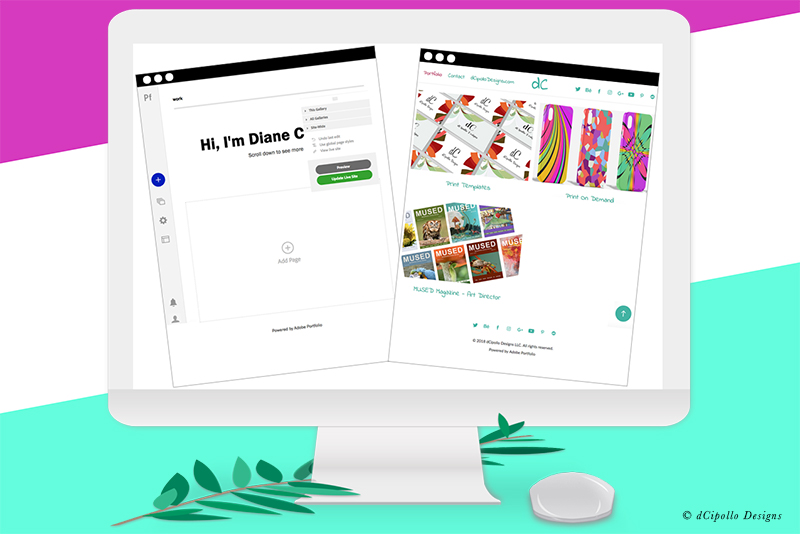
At this point, we have one page in our Adobe Portfolio, which is the default gallery. Now, we will open the Manage Content panel and add some other content to our site. Also, we have the option to change the name of our default gallery.
Click the Gear icon at the right and next to the toggle button, to open the menu. As you can see, we can change the gallery title and slug. A page slug is the text that identifies a page in a url. This helps search engines to index your site. For example, in the url below, work is the slug for the current page.
https://dcipollodesigns.myportfolio.com/work
Of course, if we change the title for the work gallery, we will want to change the slug also.
Returning to the menu, we can do other tasks including view the gallery, duplicate the gallery, hide or remove the gallery link from the top nav menu, password protect and delete the gallery.
Edit Gallery Title
When you select the Edit Gallery Title option from the menu, you will open a text box (see screenshot). Select the current gallery title and type in the replacement. Click the Return button on your keyboard. You should see the title update immediately.
Edit Slug
Repeat the previous step to change the text for the page slug (see screenshot).
Add Gallery Password
Previously we discussed how we could password protect the entire site. However, you might want to password protect just a gallery or page. To do this, select the gallery or page title, open the menu and click Add Password. Next, add a password in the text box (see screenshot).
New Page
When you select the Page option from the bottom menu (see screenshot), you will get a pop up panel. Replace the My New Page text with the title for your new page. Use the pop up menu to assign this page to a gallery or to a new gallery.
To create a new page that is not part of a gallery, set the Destination option to Navigation. This will create a new page and add a link to the page in the top navigation. But the new page will not be added to a gallery and will be listed individually in the panel.
Note that Adobe Portfolio has a prebuilt contact form that you can use on your contact page.
New Gallery
Choosing the Gallery option from the bottom menu, will open another pop up panel (see screenshot). Add a title for your new gallery and click the Create Gallery button.
External Link
As this site is mostly a portfolio, you might want to add a few links in the top navigation that will take your visitors to other important websites, such as your business website or your store on an online marketplace.
Do to this, choose the Link option from the bottom menu. In the pop up panel (see screenshot), add a label or title for the external link, such as My Shop and add the url for the external website.
Order of Links in Nav
When you have added more pages, galleries or links to the site, each addition is placed at the bottom of the list in the Manage Content panel. The order of the content in this panel controls the order of the links in the nav menu. You can click on the left end of any item and drag it up or down the list to change the order of the links in the top nav.
Integrations
Finally, you will use this panel (see screenshot) to control the integration of your portfolio with your Behance account and Lightroom albums.
After all this, you should have your navigation complete in the top menu. Next, we will add some pages, along with content, to our default gallery.
https://www.myportfolio.com/
https://www.myportfolio.com/editor/portfolio
https://www.myportfolio.com/switch-theme
Copyright 2018 Adobe Systems Incorporated. All rights reserved. Adobe product screen shot(s) reprinted with permission from Adobe Systems Incorporated. Adobe, Photoshop, Photoshop Album, Photoshop Elements, Illustrator, InDesign, GoLive, Acrobat, Cue, Premiere Pro, Premiere Elements, Bridge, After Effects, InCopy, Dreamweaver, Flash, ActionScript, Fireworks, Contribute, Captivate, Flash Catalyst and Flash Paper is/are either [a] registered trademark[s] or a trademark[s] of Adobe Systems Incorporated in the United States and/or other countries.
Manage Content
From the left Editor Toolbar, click the Manage Content icon. In this panel (see screenshot), we have just our work main gallery page listed. As we add pages to this gallery, they will be listed under the work gallery. Also, as we add more galleries and non-gallery pages, they will also be listed in this panel.Click the Gear icon at the right and next to the toggle button, to open the menu. As you can see, we can change the gallery title and slug. A page slug is the text that identifies a page in a url. This helps search engines to index your site. For example, in the url below, work is the slug for the current page.
https://dcipollodesigns.myportfolio.com/work
Of course, if we change the title for the work gallery, we will want to change the slug also.
Returning to the menu, we can do other tasks including view the gallery, duplicate the gallery, hide or remove the gallery link from the top nav menu, password protect and delete the gallery.
Edit Gallery Title
When you select the Edit Gallery Title option from the menu, you will open a text box (see screenshot). Select the current gallery title and type in the replacement. Click the Return button on your keyboard. You should see the title update immediately.
Edit Slug
Repeat the previous step to change the text for the page slug (see screenshot).
Add Gallery Password
Previously we discussed how we could password protect the entire site. However, you might want to password protect just a gallery or page. To do this, select the gallery or page title, open the menu and click Add Password. Next, add a password in the text box (see screenshot).
Adding Content
When you are ready to add more pages to your site, click the blue plus icon at the bottom of Manage Content panel. As you can see (see screenshot), we can add a new page, add a Lightroom album, add a new gallery or add an external link. When you add something, a new link will appear in the top nav menu, unless you use the Hide in Navigation option.New Page
When you select the Page option from the bottom menu (see screenshot), you will get a pop up panel. Replace the My New Page text with the title for your new page. Use the pop up menu to assign this page to a gallery or to a new gallery.
To create a new page that is not part of a gallery, set the Destination option to Navigation. This will create a new page and add a link to the page in the top navigation. But the new page will not be added to a gallery and will be listed individually in the panel.
Note that Adobe Portfolio has a prebuilt contact form that you can use on your contact page.
New Gallery
Choosing the Gallery option from the bottom menu, will open another pop up panel (see screenshot). Add a title for your new gallery and click the Create Gallery button.
External Link
As this site is mostly a portfolio, you might want to add a few links in the top navigation that will take your visitors to other important websites, such as your business website or your store on an online marketplace.
Do to this, choose the Link option from the bottom menu. In the pop up panel (see screenshot), add a label or title for the external link, such as My Shop and add the url for the external website.
Order of Links in Nav
When you have added more pages, galleries or links to the site, each addition is placed at the bottom of the list in the Manage Content panel. The order of the content in this panel controls the order of the links in the nav menu. You can click on the left end of any item and drag it up or down the list to change the order of the links in the top nav.
Integrations
Finally, you will use this panel (see screenshot) to control the integration of your portfolio with your Behance account and Lightroom albums.
After all this, you should have your navigation complete in the top menu. Next, we will add some pages, along with content, to our default gallery.
https://www.myportfolio.com/
https://www.myportfolio.com/editor/portfolio
https://www.myportfolio.com/switch-theme
Copyright 2018 Adobe Systems Incorporated. All rights reserved. Adobe product screen shot(s) reprinted with permission from Adobe Systems Incorporated. Adobe, Photoshop, Photoshop Album, Photoshop Elements, Illustrator, InDesign, GoLive, Acrobat, Cue, Premiere Pro, Premiere Elements, Bridge, After Effects, InCopy, Dreamweaver, Flash, ActionScript, Fireworks, Contribute, Captivate, Flash Catalyst and Flash Paper is/are either [a] registered trademark[s] or a trademark[s] of Adobe Systems Incorporated in the United States and/or other countries.

Related Articles
Editor's Picks Articles
Top Ten Articles
Previous Features
Site Map
Content copyright © 2023 by Diane Cipollo. All rights reserved.
This content was written by Diane Cipollo. If you wish to use this content in any manner, you need written permission. Contact Diane Cipollo for details.


