Charity Quilt - Embroidered Blocks
 Easy Charity Quilt using Embroidery blocks
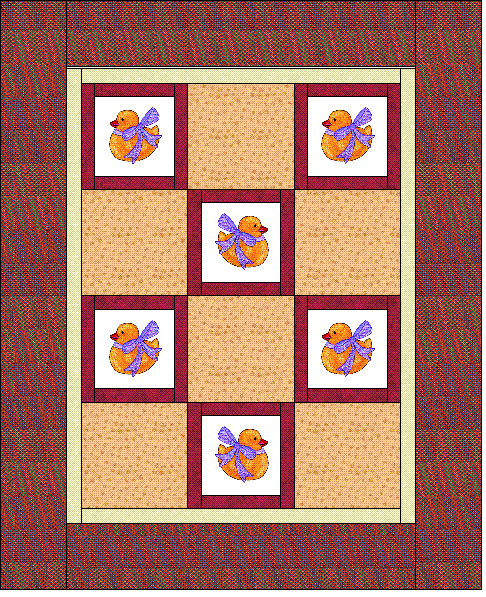
Here's a quick and easy Charity project that features two blocks. This charity quilt pattern is very simple, but makes a great impact when using the right fabrics. Essentially, the pattern is made up of six embroidered blocks, that are framed, six complimentary blocks the same size of the embroidered / framed blocks; and then several borders. The quilt measures 44-3/8" x 36-1/4"
Fabric Requirements:
Embroidered Blocks Fabric:1/2 yard
Frame Fabric:1/4 yard
Complimentary Squares Fabric:1/2 yard
Border 1 (inner border) Fabric:1/4 yard
Border 2 (outer border) Fabric:1 ¼ yard
Binding:1/4 yard
Cutting Instructions
Embroidered Block Fabric:
Complimentary Blocks Fabric:
Frame Fabric:
Border 1 Fabric:
Border 2 Fabric:
Binding Fabric:
Sewing Instructions:
Step 1: Embroider the pattern onto the blocks. It is advisable to use some sort of stabilizer on the back such as Whisper Weft. This makes it a little easier to embroider and allows you to carry threads at the back without noticing it on the front. Once the embroidery is completed RESIZE these blocks to be exactly 6 ½” x 6 ½”. We do this because embroidery tends to pull the fabric in a little.
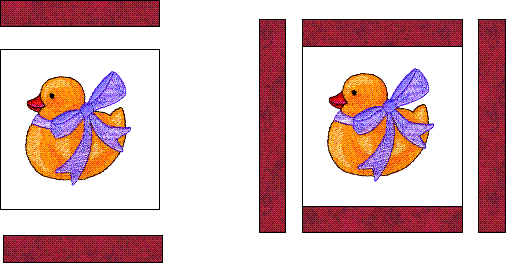
Step 2: Putting the quilt blocks together. Framing the embroidered blocks. Using the frame fabric, sew the short pieces to the top and bottom of each embroidered block. Press the seams to the dark fabric. Using the long frame pieces, sew to the right and left sides of the embroidered block, pressing the seams to the dark fabric. These blocks should measure 8 ½” x 8 ½” square.
Step 3:. Now place all 12 blocks on the workspace in front of you, according to the pattern (see quilt picture). Sew these blocks together, a row and a time. Now sew the rows together to create the inside section of the quilt.
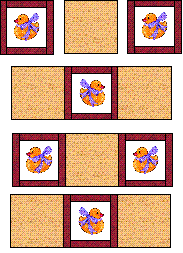
Step 4: Now it’s time for the two borders. Let’s start with border 1.
Using the border 1 fabric, sew the short pieces to the top and bottom of the quilt. Press the seams to the dark fabric. Sew the long border 1 fabric pieces to the right and left sides of the quilt. Press the seams to the dark fabric.
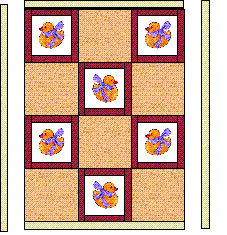
Step 5: Finally, sew the short pieces of the border 2 fabric to the top and bottom of the quilt. Press the seams the dark fabric. Sew the long border 2 fabric pieces to the right and left sides of the quilt. Press the seams to the dark fabric.
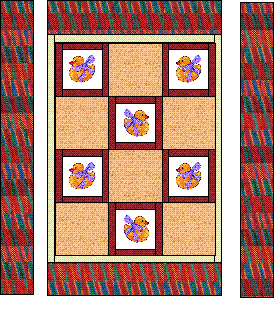
Step 6:There you have it, a completed quilt top. Now sandwich the three layers (quilt top, quilt batting, quilt backing) together and machine quilt as desired. Bind using doubled binding, mitering at corners and finishing with an invisible join.

Related Articles
Editor's Picks Articles
Top Ten Articles
Previous Features
Site Map
Content copyright © 2023 by Judie Bellingham. All rights reserved.
This content was written by Judie Bellingham. If you wish to use this content in any manner, you need written permission. Contact Judie Bellingham for details.


