Block Stamp Uses

Did you ever see a stamp with just a square or two and not know what to do with it? Instinctively, you know that the stamp is used as a background stamp, but how can you use it? I think that question is the real reason we have so many stamps that we had to buy that are now tucked away somewhere and never used! In this article I will give you three ways to use block stamps that will make you want to dig your stamps out of the drawer and try them right now.

Sample 1
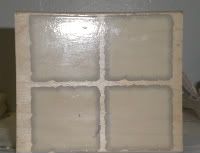
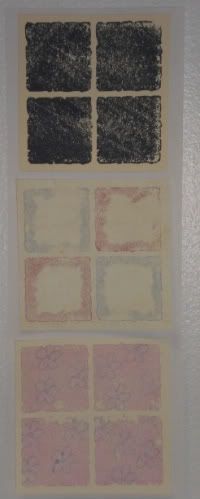
First, lets try the obvious. I am using Hero Arts H2047 for my three samples. This stamp is four blocks forming a square. You can use any ink that you prefer in any color. To keep things simple, I used black ink.

Sample 2
For this sample, I used markers and colored the edges of each square. I used blue Tombo ABT 553 and pink Tombo ABT 772 markers, and again you can use the markers of your choice in your favorite colors.
Sample 3
This sample is the hardest, but that is what makes it interesting. The technique is called kissing. First, you ink your stamp any color. Then, with a different stamp, you ink it and stamp it onto your block stamp. Your second stamp can be a small stamp that you stamp several times to create a pattern, or a large stamp that you stamp once onto the block stamp. Using different colors will create very different effects, so be sure to experiment before your stamp your final project.
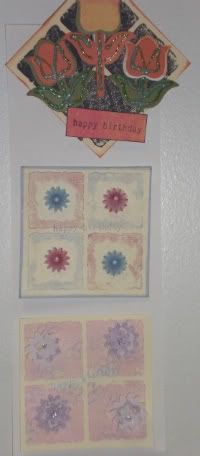
Now that the background is done, there are two different approaches that you can take to finish your image. The first approach would be to view the squares as one image and ignore lines. This can be seen in the first sample. Using a Sizzix flower dye cut, I cut three flowers and placed them over the squares in a haphazard way. The background squares add dimension to the flowers, but they do not guide the design of the flower placement. The happy birthday stamp by Stampin Up! adds to the design by complimenting the flower image and disregarding the boxes. The boxes act as a traditional background and are not the focal point of the image.

The second approach is to stay within the lines of the boxes, and treat each box as a separate image and seen in the second sample. This layout is neat and organized, and all of the images stay within the lines. The boxes become part of the image and part of the focal point. The second and third samples use the background in this way.
This site needs an editor - click to learn more!
You Should Also Read:
Coloring Your Rubber Stamped Image
The Perfect Stamped Image
Cleaning Your Rubber Stamps
Related Articles
Editor's Picks Articles
Top Ten Articles
Previous Features
Site Map
Content copyright © 2023 by Carol Taller. All rights reserved.
This content was written by Carol Taller. If you wish to use this content in any manner, you need written permission. Contact
BellaOnline Administration
for details.


