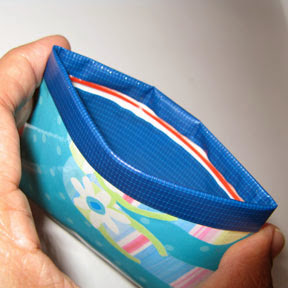
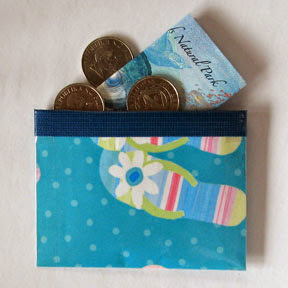
How to Make a Paper Ziploc Coin Purse

In another article elsewhere on this site, we looked at how to make a coin purse out of a juice or milk carton with a snap fastener closure. Today we’ll make another paper coin purse, this time using a Ziploc closure. This coin purse is based on a duct tape wallet designed by Tonia Jenny (you can watch her tutorial here), but instead of duct tape we'll use laminated decorative paper. Read on to find out more!


You will need:
* Decorative or patterned paper
* Clear contact paper
* Duct tape in a color to match your paper
* Ziploc bag
* Cutting mat
* Craft knife
* Sharp scissors
* Ruler
Measure, mark and cut a piece of decorative or patterned paper to 3-3/4 by 5-1/2 inches. Cut two pieces of clear contact paper that are slightly bigger than the decorative paper. Fold the paper in half crosswise, then flatten it out again.
Next, laminate the inside of the purse. Put the paper decorative side down on your work surface. Peel off the backing from the contact paper a little bit at a time and apply it on the paper, burnishing it well as you go along so as not to trap any air bubbles or form wrinkles. Trim off any excess contact paper.
Now fold the paper again with the decorative side out. Take the other piece of contact paper and fold it half crosswise, and then carefully cut the backing paper from end to end along the fold (make sure not to cut the contact paper). Nest the decorative paper inside the contact paper, aligning their folds. Peel off one half of the backing paper bit by bit starting from the fold, and carefully stick it to the decorative paper, burnishing well as you go to avoid bubbles and wrinkles. Repeat with the other half. Trim off any excess contact paper.
Cut off the Ziploc from a bag, leaving 3/8 inch of the bag from the top and bottom of the Ziploc. Cut the Ziploc to 3-3/4 inches, and slide apart the two pieces; set aside.
Cut two pieces of duct tape 4 inches long by 1/2 inch wide. Take one of the Ziploc parts, align the edge with the top inside edge of the decorative paper, tape the bottom of the Ziploc to the decorative paper and burnish well. Trim off the excess tape. Repeat with the other side of the Ziploc. Cut two pieces of duct tape measuring 4 inches by 3/4 inch, tape the upper edge of the Ziploc and fold the tape over the top of the paper. Burnish well, and trim the excess tape. Repeat with the other side. Both parts of the Ziploc should now lock when you press them together.
With the Ziploc closed, cut two pieces of clear contact paper measuring 3 inches by 3/4 inch, and use them to seal the sides of the purse. Burnish well and trim off the excess contact paper.
Cut a piece of duct tape measuring 8 inches by 3/4 inches. Wrap it around the top of the purse, fold it over the edge and tuck it down the inside of the purse. Burnish the tape well.
You Should Also Read:
Make a Milk Carton Coin Purse

Related Articles
Editor's Picks Articles
Top Ten Articles
Previous Features
Site Map
Content copyright © 2023 by Mia C. Goloy. All rights reserved.
This content was written by Mia C. Goloy. If you wish to use this content in any manner, you need written permission. Contact Mia C. Goloy for details.


