Washi Tape Your Office Supplies

Washi tape! If you're an avid paper crafter, chances are, you have a roll or two of washi tape somewhere among your supplies, and you probably know how addicting it can get. If you haven't tried using washi tape yet, then come on and join the fun! You may find yourself covering every available surface with it – if washi tape sticks to it, then why not?
Today we'll look at how washi tape can turn boring office supplies into pretty little things to brighten up your office space. More specifically, we'll take a bunch of clips, push pins and magnets and give them a washi tape makeover. Here we go!
You will need:
* Washi tape, 15mm wide
* Sharp scissors
* Mod Podge or gel medium for sealing (optional)
* Florist's wire
* Paper clips
* Push pins
* Thumb tacks
* Wood spring type clothespins
* Binder clips
* Magnetic sheet or magnetic tape
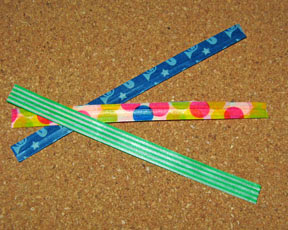
Twist ties – Cut a 4-inch piece of wire. Cut a 4-inch piece of 15mm tape and lay the wire ¼ from the edge of the tape. Fold the tape in half over the wire and burnish it. You can use longer wire and tape if you wish.
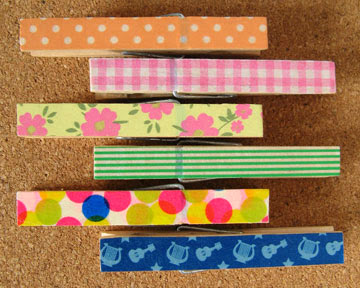
Clothespins – Wood spring-type clothespins are no longer just relegated to the laundry room. Dress them up for the office by covering both sides of a clothespin with washi tape. Trim the excess, burnish well, coat with Mod Podge or gel medium if desired, and let dry.
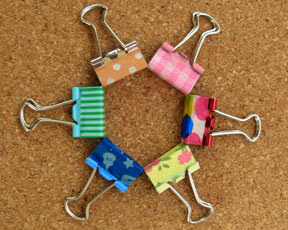
Binder clips – Cut a length of tape that's long enough to go around the body of the clip. Place one end of the tape as close as possible to the looped part of the clip and in line with the side. Trim off the excess and burnish the tape. If your tape is narrower than the clip, cut another piece and lay it right next to the first one; trim the excess and burnish well.
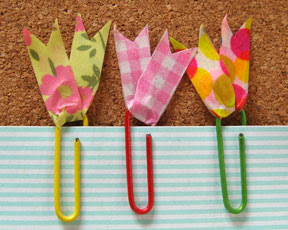
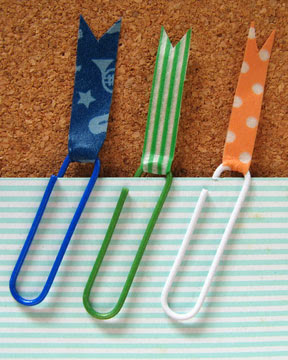
Paper clips – For regular paper clips, cut a 1-1/2 inch piece of tape and cut this lengthwise into a ¼ inch strips. For large or jumbo paper clips, cut the tape into 2-inch pieces; there's no need to cut the tape in half. Insert one piece of tape through the clip, where the wire ends are, and then stick the tape ends. Insert another piece of tape through the clip at an angle to the first piece, and stick the ends together. Cut notches into the ends of the tape. You can also use just one piece of tape.
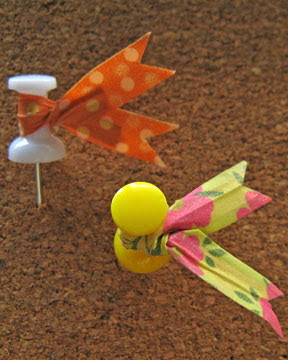
Push pins – Make a 2-inch twist tie (see instructions above) and twist it around the pushpin so that the ends stick out. Trim the edges. You can also make a 3-inch twist tie using the full width of the tape (cut two pieces and sandwich the wire between them), and then twist this around the push pin in the form of a bow. Trim the edges.
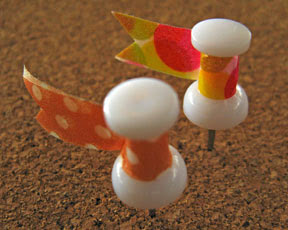
Another way is to simply wrap a narrow piece of tape roughly 2 inches long around the pushpin like a flag. Trim the end of the tape.
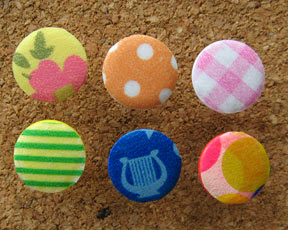
Thumbtacks – Cut and stick a piece of washi tape onto the head of a thumbtack and trim around the edge with a small sharp scissors. Burnish the tape, and seal with Mod Podge or gel medium if desired.
Magnets – Lay a strip of washi tape onto a magnetic sheet and burnish well. Trim off the excess magnetic sheet, then cut the strip into 2-inch pieces. Alternatively, you can lay pieces of tape side by side on the magnetic sheet, and then cut out a shape from it. You can also cover magnetic tape with washi tape and cut it to length.
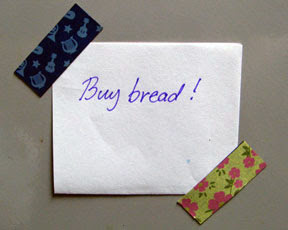
Today we'll look at how washi tape can turn boring office supplies into pretty little things to brighten up your office space. More specifically, we'll take a bunch of clips, push pins and magnets and give them a washi tape makeover. Here we go!
You will need:
* Washi tape, 15mm wide
* Sharp scissors
* Mod Podge or gel medium for sealing (optional)
* Florist's wire
* Paper clips
* Push pins
* Thumb tacks
* Wood spring type clothespins
* Binder clips
* Magnetic sheet or magnetic tape
Twist ties – Cut a 4-inch piece of wire. Cut a 4-inch piece of 15mm tape and lay the wire ¼ from the edge of the tape. Fold the tape in half over the wire and burnish it. You can use longer wire and tape if you wish.
Clothespins – Wood spring-type clothespins are no longer just relegated to the laundry room. Dress them up for the office by covering both sides of a clothespin with washi tape. Trim the excess, burnish well, coat with Mod Podge or gel medium if desired, and let dry.
Binder clips – Cut a length of tape that's long enough to go around the body of the clip. Place one end of the tape as close as possible to the looped part of the clip and in line with the side. Trim off the excess and burnish the tape. If your tape is narrower than the clip, cut another piece and lay it right next to the first one; trim the excess and burnish well.
Paper clips – For regular paper clips, cut a 1-1/2 inch piece of tape and cut this lengthwise into a ¼ inch strips. For large or jumbo paper clips, cut the tape into 2-inch pieces; there's no need to cut the tape in half. Insert one piece of tape through the clip, where the wire ends are, and then stick the tape ends. Insert another piece of tape through the clip at an angle to the first piece, and stick the ends together. Cut notches into the ends of the tape. You can also use just one piece of tape.
Push pins – Make a 2-inch twist tie (see instructions above) and twist it around the pushpin so that the ends stick out. Trim the edges. You can also make a 3-inch twist tie using the full width of the tape (cut two pieces and sandwich the wire between them), and then twist this around the push pin in the form of a bow. Trim the edges.
Another way is to simply wrap a narrow piece of tape roughly 2 inches long around the pushpin like a flag. Trim the end of the tape.
Thumbtacks – Cut and stick a piece of washi tape onto the head of a thumbtack and trim around the edge with a small sharp scissors. Burnish the tape, and seal with Mod Podge or gel medium if desired.
Magnets – Lay a strip of washi tape onto a magnetic sheet and burnish well. Trim off the excess magnetic sheet, then cut the strip into 2-inch pieces. Alternatively, you can lay pieces of tape side by side on the magnetic sheet, and then cut out a shape from it. You can also cover magnetic tape with washi tape and cut it to length.

Related Articles
Editor's Picks Articles
Top Ten Articles
Previous Features
Site Map
Content copyright © 2023 by Mia C. Goloy. All rights reserved.
This content was written by Mia C. Goloy. If you wish to use this content in any manner, you need written permission. Contact Mia C. Goloy for details.


