Quilt Blocks of the States - Wisconsin
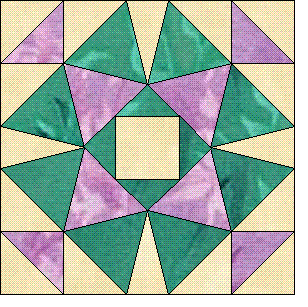 Wisconsin - 12" Quilt Block
The next block in our State Quilt Block Series is Wisconsin This pattern is a bit tricky, but if taken step by step, it will come together beautifully.
To print out the templates Click here.
Make heavy templates from the photocopy, don’t forget to add ¼” seam allowance to all templates.
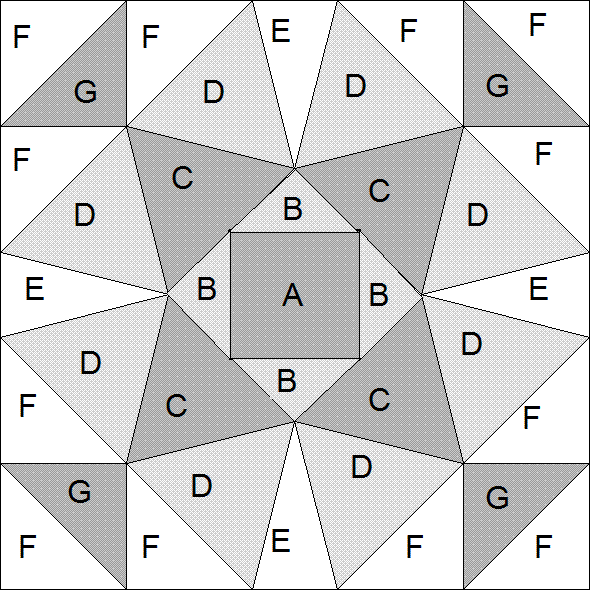
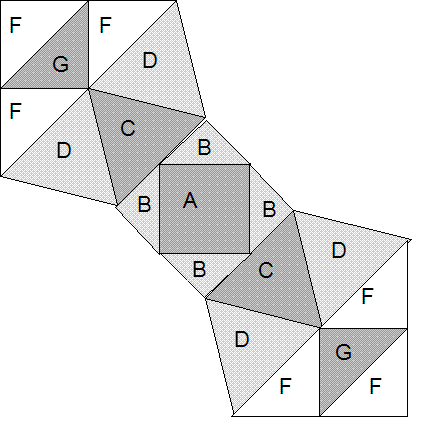
Here's a black and white map for easy identification of templates and their location:
Cutting Instructions
 Light Fabric (Cream):
Medium Fabric (Lilac):

Dark Fabric (Teal Blue):
Sewing Instructions:
Please note: The templates DO NOT INCLUDE THE ¼” SEAM ALLOWANCE. Cut out the required fabric pieces according to the template map above and lay them out on the worksurface.
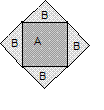
Step 1: This block is created by making three separate sections, then joining them together. The first section (shown above) will be made first. Take the A template and sew the four B templates to each side of the square. Set aside for now.
Step 2: Make the triangular units using the templates F&G. Take a G template and sew a F template to the three sides of the G template. Repeat one more time using other F&G templates.
Step 3: Make the DCD unit. Take a C template and sew a D template to opposite sides of the C template. (see below, and check the template map for color direction)
Step 4: Sew the GFFF unit to the CDC unit. (see diagram below)
Step 5: Sew the unit you’ve just made to one side of the ABBB unit. Do likewise on the other side of the ABBB unit. (see the diagram below)

Step 6: Now to make the second and third sections that are identical. Make a unit similar to the one made in step 4, but sew an E template to each end of the D templates. Repeat this unit using the remaining templates(see diagram below)
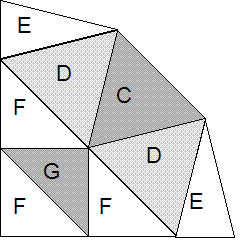
Step 7: Now sew the second section to the bottom left of the first section (see diagram below) using the technique outlined in the Set In Seams PDF.
To print out the Set in Seams PDFClick here.
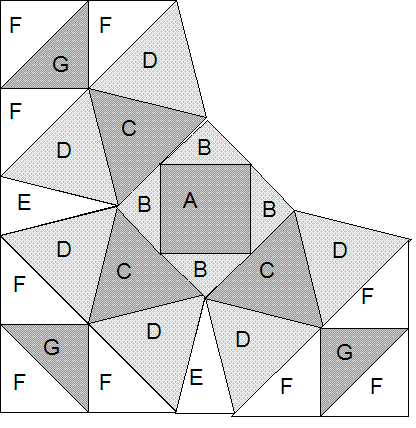
Step 8: Finally, sew the remaining third section to the top right of the block.

Your block should measure 12-1/2" on all sides. It will measure 12" finished size when it is sewn into a quilt.
You Should Also Read:
Quilt Blocks of the States

Related Articles
Editor's Picks Articles
Top Ten Articles
Previous Features
Site Map
Content copyright © 2023 by Judie Bellingham. All rights reserved.
This content was written by Judie Bellingham. If you wish to use this content in any manner, you need written permission. Contact Judie Bellingham for details.


