
Make an Easter Goodies Basket

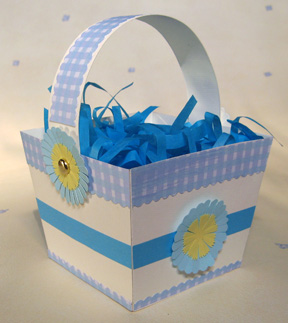 Our project today is an Easter basket that can also be used for other occasions like birthdays and christenings by simply changing the color scheme and accents.
 You will need:
* Access to a computer printer
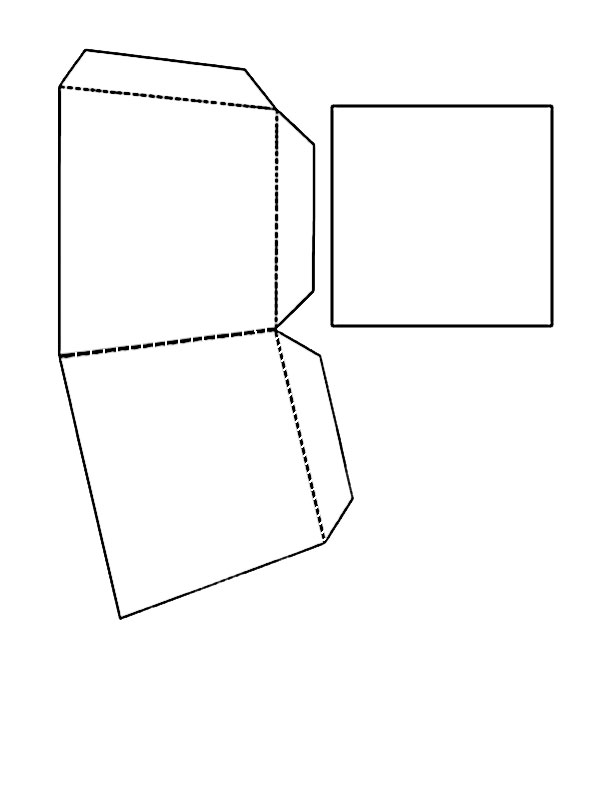
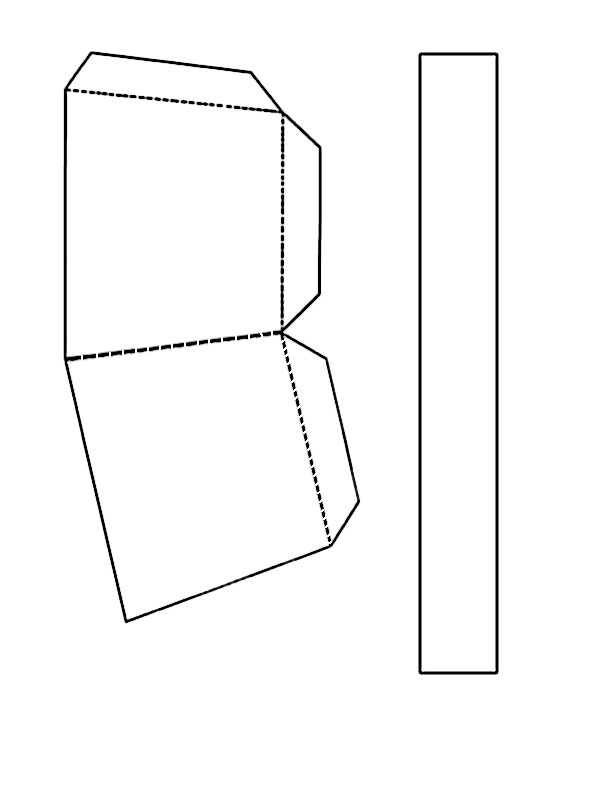
* Basket templates, part 1 and part 2 (available here and here)
* Two sheets of cream or white cardstock, 8-1/2 by 11 inches
* Blue patterned paper
* Deep sky blue paper
* Baby blue paper
* Yellow paper
* Two paper fasteners or brads
* Tissue paper in a matching color
* Circle template, around 1-1/2 inches in diameter
* Decorative scissors or border punch
* Flower craft punch
* One-hole punch
* Ruler
* Pencil
* Glue stick
* Double-sided tape
* Straight edge scissors
Print Part 1 and Part 2 of the basket templates onto cream cardstock. Cut out the pieces and fold along the dotted lines. Using double-sided tape, attach the side tab of one basket panel to the non-tabbed side of the other panel to form a four-piece panel, but don’t assemble the rest of the basket just yet.
From the patterned paper, cut four strips, each measuring 3-3/4 inches by 3/4 inch. On each strip, form one scalloped edge using decorative scissors or a border punch. Glue the strips around the top of the basket and trim off the excess.
Cut four more strips from the patterned paper, each measuring 3 inches by 1/4 inch. Cut one edge of each strip into scallops. Glue the strips around the bottom of the basket, and trim off the excess.
Cut one more strip measuring 6 inches by 3/4 from the patterned paper. Glue this to the handle of the basket and set aside.
From the deep sky blue paper, cut four strips each measuring 3-1/2 inches by1/2 inch, Glue the strips around the middle of the basket, and trim off the excess.
Make fringed flowers using the baby blue paper. For each flower, measure and mark a 1-1/2 inch circle onto the paper and cut it out using decorative scissors (You can also use a craft punch with this shape if you have one). Cut slits from the edge of the circle going halfway towards the center to form petals. Punch two yellow flowers for the center and then glue them one on top of the other, with their petals overlapping. Glue this to the center of the fringed flower. Make three more fringed flowers.
Take two of the fringed flowers and glue them on opposite sides of the basket, onto the deep sky blue strip. Take the two remaining flowers and punch a hole in their centers. Set aside.
Now assemble the basket using double-sided tape. Attach the side tab to the basket panel, and then attach the square panel to the bottom tabs of the basket. On the basket panels without flowers, punch a hole near the top. Take the basket handle and punch a hole on each end. Insert the paper fastener through the fringed flower, then through the hole in the basket, and then through the basket handle so that the handle is inside the basket. Open up the prongs of the fastener to secure the handle to the basket. Repeat with the other end of the handle.
Shred or cut some matching tissue paper into thin strips and form a nest inside the basket. Add candies and other treats to finish.
You Should Also Read:
Layered Fringed Flower

Related Articles
Editor's Picks Articles
Top Ten Articles
Previous Features
Site Map
Content copyright © 2023 by Mia C. Goloy. All rights reserved.
This content was written by Mia C. Goloy. If you wish to use this content in any manner, you need written permission. Contact Mia C. Goloy for details.
