How to Make a Tissue Paper Flower

 Colorful tissue paper flowers can add a festive touch to celebrations. They can be used in bouquets, garlands, and wreaths, as embellishments at a table setting, or as gift toppers. If you need a large number of paper flowers to decorate your home or garden for a special occasion, or perhaps to serve as props for a parade, the tissue paper flower is a safe bet. The material is inexpensive, readily available, and comes in a range of colors. The flower is easy to make, so you can produce several pieces in an hour’s time. It’s also bulky, which means you can quickly fill up space without having to make hundreds of these flowers (and even if you did need a hundred, you could easily whip them up in no time!). Note that tissue paper is not color-fast and tends to fade over time especially in strong sunlight, and the colors will run when wet, but that should not be a problem if you don’t intend to keep the tissue paper flowers out all year round!
You will need:
* Tissue paper, enough to make six pieces each measuring 5 x 10 inches
* Stamp pad (optional)
* One piece of wire wrap or green pipe cleaner
* Scissors
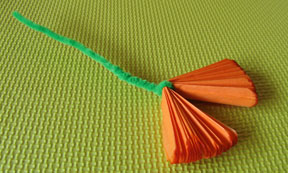
Measure and cut the tissue paper to the specified size. Stack the six sheets, one on top the other. Starting on the short side, make accordion folds on the paper, with each fold being around 1/2 inch wide. When you are done, trim the ends of the folded paper. Rounding the corners will give the petals a soft, ruffled look, while cutting the corners at an angle will give the petals a jagged look. As an additional step, you may want to ink the ends with a stamp pad to give the petals a variegated effect.
Find the middle of the folded paper, and twist the wire wrap around it to secure the paper. If you're making a flower with a stem, bend the pipe cleaner about 2 inches from one end to make a hook, then hook the folded paper in the middle and twist the ends of the pipe cleaner together to form the stem.

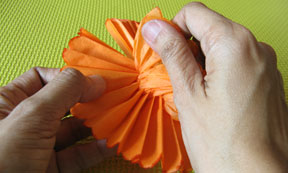
Starting with one end of the folded paper, carefully separate the layers one at a time so that paper doesn't tear. Repeat with the other end.

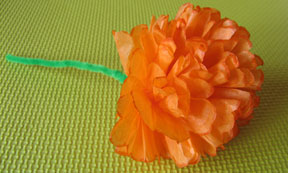
When all the layers are separated, use your fingers to fluff up the paper, arranging the layers so that they look more natural. The tissue paper flower is now ready for use!
You Should Also Read:
Paper Rose
Fringed Paper Flower
Make a Fan Fold Flower

Related Articles
Editor's Picks Articles
Top Ten Articles
Previous Features
Site Map
Content copyright © 2023 by Mia C. Goloy. All rights reserved.
This content was written by Mia C. Goloy. If you wish to use this content in any manner, you need written permission. Contact Mia C. Goloy for details.


